DIY Wood Fencing: Tips And Tricks For A Successful Project
Residential - Commercial - Industrial
Discover The Ultimate Guide To Diy Wood Fencing. Get Expert Tips And Tricks For A Successful Project And Transform Your Outdoor Space Today
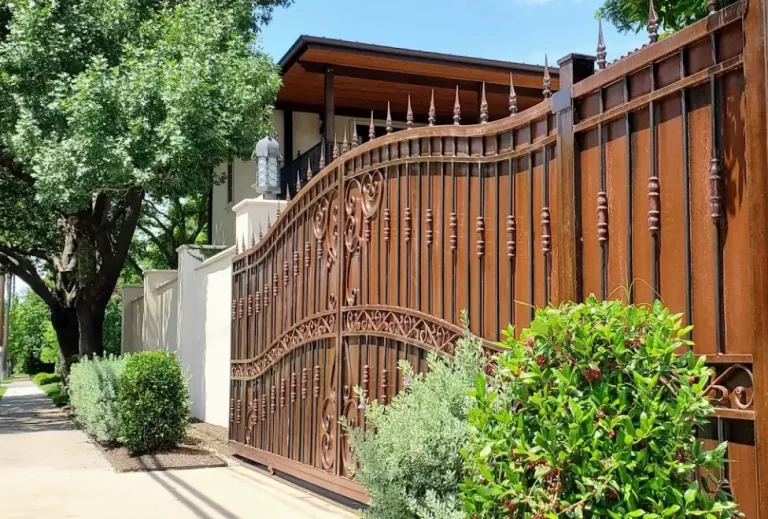
Looking to add a touch of rustic charm to your yard? Look no further than DIY Wood Fencing: Tips and Tricks for a Successful Project.
In this article, we’ll guide you through the process of creating a beautiful and functional wood fence, all on your own.
From determining your fencing needs to mastering the installation process, we’ve got you covered.
So grab your tools and get ready to transform your outdoor space into a cozy sanctuary that truly feels like home.
Key Takeaways
- Proper planning and preparation, including budget considerations and gathering necessary tools, is essential for a successful DIY wood fencing project.
- Accurate measurement and marking, along with proper installation techniques, are crucial for ensuring a secure and durable fence, especially when dealing with uneven terrain.
- Regular maintenance and care, such as regular inspection, cleaning, and staining, are important for preserving the beauty and longevity of the wood fence.
- DIY wood fencing offers benefits such as customization, cost savings on labor, and a sense of accomplishment and creative expression.
Determine Your Fencing Needs and Goals
Before starting your DIY wood fencing project, it’s important to determine your fencing needs and goals. Understanding your budget and researching local regulations are crucial steps in this process.
First, consider your budget. Determine how much you are willing to spend on your fence project. This will help you decide the size and materials you can afford. Take into account not only the cost of the materials but also any additional expenses such as tools or professional help if needed.
Next, research local regulations. Different areas have different rules and restrictions regarding fencing. Check with your local municipality or homeowners association to find out about height restrictions, setback requirements, and any permits you may need. This will ensure that your fence meets all necessary guidelines and avoids any potential problems in the future.
Understanding your budget and researching local regulations will set the foundation for a successful DIY wood fencing project. Once you have a clear understanding of your needs and goals, you can move on to choosing the right materials.
Choose the Right Materials
To ensure a successful outcome, it’s important to select the appropriate materials for your DIY wooden fence. Here are some tips to help you choose the right materials:
Wood types: The type of wood you choose for your fence will greatly impact its durability and appearance. Cedar and redwood are popular choices due to their natural resistance to rot and insects. Pine and spruce are more affordable options but may require extra maintenance to prevent decay.
Cost considerations: When selecting materials, it’s important to consider your budget. Cedar and redwood tend to be more expensive upfront, but their longevity and low maintenance needs can save you money in the long run. On the other hand, pine and spruce may be more affordable initially, but they may require more frequent repairs and staining.
Weather resistance: Depending on your location, you may need to choose materials that can withstand extreme weather conditions. If you live in an area with high humidity or frequent rain, consider using pressure-treated wood to prevent rotting.
Aesthetics: Finally, consider the overall look you want for your fence. Different wood types have unique grains and colors that can enhance the visual appeal of your outdoor space.
Now that you have a better understanding of the materials, it’s time to prepare your tools and materials for the project.
Prepare Your Tools and Materials
Gather all the necessary tools and materials for your upcoming fence project. Choosing the right tools is crucial to ensure a successful DIY wood fencing project. Start by investing in a sturdy tape measure, a level, and a post hole digger. These tools will help you accurately measure and level your fence posts, ensuring a straight and sturdy structure. Don’t forget to have a reliable circular saw or a miter saw to cut the wood with precision. A cordless drill with a screwdriver bit will also come in handy for attaching the fence panels securely.
Once you have gathered all the tools, it’s time to organize your workspace. Clear the area and remove any obstacles that may hinder your progress. Lay out your materials, such as the wood panels, posts, and screws, in an orderly manner for easy access. Consider setting up a workbench or table to keep your tools and materials within reach.
With your tools and workspace ready, you are now prepared to master the installation process. By following the subsequent section, you will learn how to set your fence posts, attach the panels, and add finishing touches to create a beautiful and functional wooden fence.
Master the Installation Process
Once you’ve prepared your tools and materials, it’s time to dive into mastering the installation process of your wooden fence. This is where the magic happens and your vision starts to become a reality.
To ensure a successful project, keep in mind some common installation mistakes to avoid. First, make sure you accurately measure and mark the locations for your fence posts to ensure a straight and sturdy structure. Second, take your time when digging the post holes, making sure they are deep enough and properly spaced. Lastly, double-check the alignment of each fence panel before securing them in place to avoid any gaps or unevenness.
Troubleshooting tips can also come in handy during the installation process. If you encounter soft or unstable soil, consider using concrete to reinforce your fence posts for added stability. Additionally, if you’re working on uneven terrain, adjust the height of each post accordingly to ensure a level fence. Don’t forget to regularly check the plumb and level of your fence as you go along to avoid any costly mistakes.
Now that you have successfully installed your wooden fence, it’s important to know how to maintain and care for it properly.
Maintain and Care for Your Wood Fence
Take the time to regularly inspect and clean your wooden fence to ensure its longevity and appearance. Maintaining and caring for your wood fence is essential in preserving its beauty and protecting it from damage.
One important aspect of maintenance is wood fence staining. Staining your fence not only enhances its natural beauty but also provides a protective barrier against moisture, UV rays, and other elements that can cause it to deteriorate over time. Choose a high-quality stain that is specially formulated for outdoor use and apply it according to the manufacturer’s instructions. This will help prevent your fence from warping, cracking, and fading.
In addition to staining, preventing rot is another crucial step in maintaining your wood fence. Rot can occur when moisture penetrates the wood, leading to decay and structural damage. To prevent rot, make sure your fence posts are properly installed and protected. Use pressure-treated wood for your posts, as it is resistant to rot and decay. Consider using post caps and applying a waterproof sealant to further protect the wood. Regularly inspect your fence for any signs of rot, such as soft spots or discoloration, and promptly address any issues you find.
By taking the time to regularly inspect and clean your wooden fence, stain it to enhance its beauty and protect it from the elements, and prevent rot, you can ensure that your fence will remain in excellent condition for years to come. Not only will this add value to your property, but it will also create a welcoming and attractive outdoor space that you can enjoy with family and friends.
Conclusion
In conclusion, tackling a DIY wood fencing project can be a rewarding and cost-effective way to enhance the aesthetics and security of your property. By following the tips and tricks outlined in this article, you can successfully install and maintain a beautiful wood fence.
Did you know that according to a recent survey, 74% of homeowners who installed their own wood fence reported feeling a sense of pride and accomplishment? So why not join the ranks of satisfied DIYers and take on this project yourself?
With the right materials, tools, and knowledge, you’ll be well-equipped to create the fence of your dreams.
We Work With All Brands
We work with all gate, garage door, fence, and access control brands and models.
Highly-Qualified Technicians
We have a team of licensed, insured & experienced technicians.
DIY Wood Fencing: Tips And Tricks For A Successful Project

DIY Wood Fencing: Tips And Tricks For A Successful Project FAQ's
How do I choose the right height and style for my wood fence?
When choosing the height and style of your wood fence, consider factors such as privacy, security, and aesthetics. Determine your needs and preferences, and select a height and style that will enhance the beauty and functionality of your outdoor space.
What are the different types of wood that can be used for fencing?
Pressure treated wood is a durable option, offering resistance to moisture and insect damage. However, cedar is naturally moisture-resistant and has a timeless beauty. Consider your needs and preferences when choosing the best wood for your fence.
How do I estimate the amount of materials needed for my wood fence project?
To calculate material requirements for your wood fence project, measure the length and height of the fence. Multiply these measurements to get the total square footage. Add extra for gates and waste. Minimize waste by planning carefully and purchasing the right amount of materials.
Can I install a wood fence on uneven terrain?
Installing a wood fence on sloped ground can be challenging, but don’t worry! You can level a wood fence on uneven terrain by using techniques like stepped panels or adjustable brackets. Let’s make your property feel complete and secure!
How often should I stain or paint my wood fence to maintain its appearance?
To maintain the appearance of your wood fence, it’s recommended to stain or paint it every 2-3 years. This frequency ensures protection against weather damage and helps maintain the fence’s charming aesthetic. Regular maintenance will keep your fence looking its best for years to come.
Leave Us A Review On Google
Thank you Alpha team!
Terry was excellent in guiding us from the first visit to the final inspection, including his experiences on what to expect and where any likely issues would occur. With a large property, that was critical to avoiding problems that could pop up.
The crews, clean up and invoicing were all done professionally.
We would strongly recommend Alpha Gate & Door for your gate access needs.
Visit Alpha Gate & Door Co. on Google Maps

If you have any question regarding our service, we encourage you to schedule an appointment or phone consultation with one of our staff.
3622 Lakeridge Dr.,
Grapevine, TX
Monday – Friday:
7:00am – 7pm
Alpha Gate & Door Co.
info@alphafencepro.com


