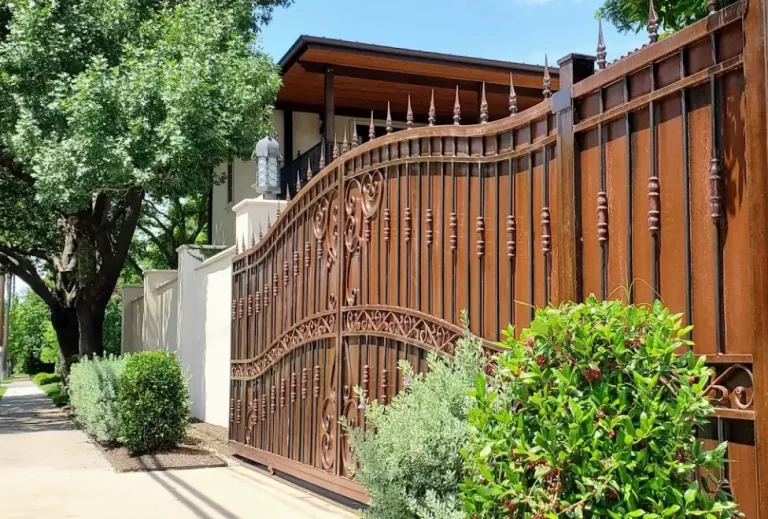
Understanding The Manufacturing Process Of Wood Fences
Residential - Commercial - Industrial
Discover The Secrets Behind Crafting Exquisite Wood Fences. Unveil The Manufacturing Process That Transforms Raw Materials Into Stunning Structures
Are you ready to unlock the secrets behind the manufacturing process of wood fences? Prepare to be amazed as we take you on a journey through the intricate steps involved in bringing these beautiful structures to life.
From selecting the perfect wood species to finishing touches and maintenance tips, we’ll leave no stone unturned.
Get ready to become an expert in the art of wood fence manufacturing and join a community of like-minded individuals who appreciate the beauty and craftsmanship of these timeless structures.
Key Takeaways
- The manufacturing process of wood fences involves selecting the right wood species, preparing and cutting the wood, constructing the fence panels, and installing the fence posts.
- Wood fences provide privacy, enhance the beauty of outdoor spaces, can be customized to fit various designs and styles, offer durability and longevity with proper maintenance, and can increase property value.
- Factors to consider in wood fence design include durability and maintenance requirements, appearance and aesthetic preferences, privacy and security needs, compatibility with the surrounding environment, and compliance with local regulations and codes.
- Alternative materials for wood fences include vinyl and composite options, which offer durability and low maintenance, different color and texture choices, resistance to rot, insects, and decay, and the ability to mimic the appearance of wood with a long lifespan and minimal upkeep.
Selecting the Right Wood Species
When selecting the right wood species for your fence, it’s crucial to consider factors such as durability and resistance to decay. Wood fences offer numerous benefits for privacy, creating a sense of belonging in your own space.
One important decision you’ll need to make is whether to choose treated or untreated wood. Treated wood is infused with chemicals that protect against rot, insects, and decay, making it a popular choice for long-lasting fences. However, untreated wood has its advantages as well. It provides a natural, rustic look and is often more affordable.
Keep in mind that untreated wood will require regular maintenance to prevent decay and ensure its longevity. Now that you’ve selected the right wood species, it’s time to move on to the next step: preparing and cutting the wood.
By understanding the benefits of each wood type and carefully considering your needs, you can make an informed decision that will result in a beautiful and durable fence.
Preparing and Cutting the Wood
To prepare and cut the wood for your fence, you’ll need to measure and mark the desired lengths.
Start by selecting the appropriate wood species for your wood fence design. Different species have different characteristics, so choose one that suits your needs in terms of durability, appearance, and maintenance requirements.
Once you have your wood, it’s time to prepare it for cutting. Make sure the wood is clean and free from any dirt or debris. Use a measuring tape to accurately measure the desired lengths for your fence panels.
Mark these measurements clearly and precisely on the wood using a pencil or marker.
Next, use a saw to carefully cut the wood according to the marked measurements. Take your time and ensure that each cut is straight and accurate. Remember to wear appropriate safety gear, such as goggles and gloves, to protect yourself during this process.
By following these wood fence installation techniques, you’ll be ready to move on to the next step of constructing the fence panels.
Constructing the Fence Panels
Once you have prepared and cut the wood, you can start constructing your fence panels. When it comes to wood fence design, there are various options to consider. You can choose a traditional design with vertical planks, or opt for a more modern look with horizontal boards. Additionally, there are alternative materials available, such as vinyl or composite, that offer durability and low maintenance.
To construct the fence panels, start by laying out the bottom and top rails horizontally, ensuring they are level. Then, attach the vertical boards to the rails, spacing them evenly apart. Use screws or nails to secure the boards in place, making sure they are flush with the top and bottom rails. Repeat this process until all the panels are constructed.
It is important to pay attention to detail during the construction process. Double-check the measurements and make sure all the boards are straight and aligned properly. This will ensure that your fence panels are sturdy and visually appealing.
Once the fence panels are complete, you can move on to installing the fence posts. This is a crucial step in the manufacturing process, as it provides the foundation for your wood fence.
Installing the Fence Posts
Before you begin installing the fence posts, gather all the necessary tools and materials. You’ll need a post hole digger, a level, gravel or concrete mix, a shovel, and the fence posts themselves.
Here are some important things to keep in mind when installing the fence posts:
Anchoring methods for fence posts: There are different methods for anchoring fence posts, including using gravel or concrete mix. Gravel is a more cost-effective option and provides good stability for shorter fences. Concrete mix, on the other hand, offers maximum strength and durability, making it ideal for taller fences.
Common mistakes to avoid when installing fence posts: One common mistake is not digging the post holes deep enough. The depth should be at least one-third the height of the fence post. Another mistake is not using a level to ensure that the posts are straight and plumb. It’s also important to properly compact the soil or concrete around the post to prevent sinking or shifting.
By following these anchoring methods and avoiding common mistakes, you can ensure that your fence posts are securely installed.
In the next section, we’ll discuss finishing and maintenance tips to keep your wood fence looking its best.
Finishing and Maintenance Tips
To keep your wood fence looking its best, it’s important to follow these finishing and maintenance tips.
First, when it comes to staining techniques, it’s crucial to choose a high-quality stain that is specifically designed for exterior wood. Before applying the stain, make sure to properly clean the fence surface to remove any dirt or debris. Use a brush or roller to evenly apply the stain, following the manufacturer’s instructions for drying time and number of coats.
Regularly inspect your fence for any signs of damage, such as cracked or splintered wood. To repair damaged wood, start by removing any loose or damaged pieces. Use a wood filler to fill in any cracks or holes, and then sand the repaired area to ensure a smooth finish. After repairs, it’s important to apply a protective sealant to prevent further damage from moisture or sunlight.
Regular maintenance, such as cleaning and reapplying stain every few years, will help extend the life of your wood fence and keep it looking beautiful.
Conclusion
So there you have it, a comprehensive understanding of the manufacturing process of wood fences.
By selecting the right wood species, preparing and cutting the wood, constructing the fence panels, installing the fence posts, and finishing and maintaining the fence, you can create a beautiful and durable addition to your property.
Here’s an interesting statistic for you: Did you know that the average lifespan of a well-maintained wood fence is 20-30 years?
With proper care, your fence can last for decades, providing both functionality and aesthetic appeal to your outdoor space.
So go ahead, start building your dream wood fence today!
We Work With All Brands
We work with all gate, garage door, fence, and access control brands and models.
Highly-Qualified Technicians
We have a team of licensed, insured & experienced technicians.
Understanding The Manufacturing Process Of Wood Fences

Understanding The Manufacturing Process Of Wood Fences FAQ's
How long does it take to manufacture a wood fence from start to finish?
To manufacture a wood fence from start to finish, it typically takes a few days to a few weeks, depending on the complexity and size of the project. Different manufacturing equipment is used throughout the process to cut, shape, assemble, and finish the wood pieces.
What tools and equipment are needed for the manufacturing process?
To manufacture wood fences, you’ll need saws, drills, nail guns, measuring tools, and sanders. These tools are essential for cutting, drilling, fastening, measuring, and smoothing the wood, ensuring precise and well-built fences.
Are there any specific safety precautions to consider during the manufacturing process?
To ensure safety during the manufacturing process of wood fences, it is important to take certain precautions. These include wearing protective gear, such as goggles and gloves, using proper equipment, and following safe operating procedures.
Can a wood fence be customized with additional features or designs?
To customize a wood fence, you can add lattice or decorative elements. Different wood species, like cedar or pine, offer various characteristics such as durability or resistance to rot, allowing for personalization.
Are there any recommended techniques for staining or painting the wood fence for better longevity?
To ensure better longevity for your wood fence, consider using staining techniques or painting techniques. These methods can protect the wood from weathering and extend its lifespan.
Leave Us A Review On Google
Thank you Alpha team!
Terry was excellent in guiding us from the first visit to the final inspection, including his experiences on what to expect and where any likely issues would occur. With a large property, that was critical to avoiding problems that could pop up.
The crews, clean up and invoicing were all done professionally.
We would strongly recommend Alpha Gate & Door for your gate access needs.
Visit Alpha Gate & Door Co. on Google Maps

If you have any question regarding our service, we encourage you to schedule an appointment or phone consultation with one of our staff.
3622 Lakeridge Dr.,
Grapevine, TX
Monday – Friday:
7:00am – 7pm
Alpha Gate & Door Co.
info@alphafencepro.com


